Category Archives: Windows

Microsoft Windows

Lost in the Cloud(s)

There are so many cloud-storage and syncing services, today, they are getting hard to keep track of. They all offer very similar features but are each tied into their own eco-system, so unless you managed to use only one company’s set of services, you will find yourself wasting time trying to remember which cloud service you saved a file to.

List of cloud services in Windows Explore

For me, I use both Windows and Mac, so I use both OneDrive and iCloud. A lot of people and apps rely on Dropbox. I subscribe (ugh!) to Adobe’s Creative Cloud. I am an avid Google apps user, so I use Google Drive. Then, for cutting edge and more flexibility, I use Resilio Sync. Not to mention my local Documents directory, where I keep a lot of my “working” files.

I will try to sort out the morass of services that you might have yourself mired in and help you begin to consolidate and simplify your use of those services.

What is Cloud-storage and Syncing?

Let’s start with the basics. With cheap storage and the omni-present internet available, several companies have provided services to allow you to save your information and files there. Putting your files in the cloud, provides two big advantages:

  1. You can free up local storage space on your computer or phone, aka, cloud-storage, and
  2. Your files can be available across your different devices—computer, laptop, tablet, smart-phone, via browser, etc.

With your files in the cloud, you will probably still need “local” access to files—traditional applications expect files to be locally accessible.  You can then take advantage of most of the services’ ability to automatically “synchronize” your files to each of your devices—computers, laptops, tablets, and smartphones—so that you needn’t think about which versions are current and where they are.

Many services even allow you share access to your file(s) with others without having to send copies of files around—multiple copies can be a problem as you try to keep straight which copies are current.

As cloud-storage becomes more prevalent, Microsoft, Apple, and even Google have designed their applications and operating systems to store and synchronize user settings in the cloud. They’ve opened this capability to allow other application developers to do the same thing. This all allows users to have a common configuration for their system and applications as they move between devices or to new ones.

Some cloud-storage services do not automatically sync files—cloud-backup services, for example. On the other hand, there are services which provide syncing of files between devices, but no actual storage of those files in the cloud.

Who is Doing This?

Dropbox has become one of the most prevalent companies to offer this service. It was one of the earliest to show that commercial success is possible. It has become so common, that many people assume that you have your own Dropbox to share files with. Box is a similar cloud-storage/syncing service—there are many others.

Bigger companies quickly picked up on the advantage and demand for these features was more widely accepted. Google eventually offers Google Drive and ties it into its other cloud-based services so that cloud stored information all used the same service. With this, we see how cloud-storage and syncing becomes a key component to a company’s eco-system. Similarly, Apple and Microsoft built eco-systems of their own with iCloud and OneDrive, respectively. Since they have their own operating systems, they have provides services to sync most of the key system settings into their cloud storage, and allow third party developers to do the same with their applications. This allows user configurations to be set in one device and have it affect all the others; a nice convenience.

Then, there are other services such Resilio’s Sync and Syncthing which do not store the files in the cloud, but does provide syncing between devices. This is arguably more private because you are not storing your files on a third-party service, but it does require that two of the syncing devices are connected to the internet and running simultaneously, in order for those devices to sync. Also, these services do not tally and charge for cloud storage used, since there isn’t any.

Tangled Cloud Mess

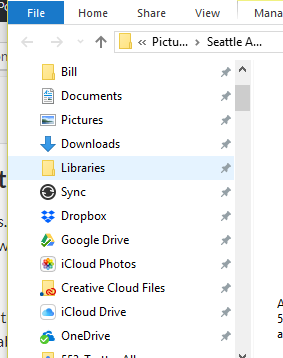
Each popular service offers ties to different applications (and operating systems) and are preferred by different applications, thus each has its own advantages. By default, most of these services create their own folder, under the user’s “home” folder (C:\Users\username for Windows and /Users/username in macOS), in which each services syncs files. And these are separate from where our computers and laptops expect to you to working on your files, the Documents folder, for example.

This leads to your working files and your synced files becoming dispersed across the different services and their folders. This, in turn requires that we keep track of which service a file had been saved to, so that you find it when you need.

Untangling the Cloud

So, how can we solve the problem of not knowing “where” our files are? One way is to consolidate the services’ sync-folders so that they all use the same folder.

Both iCloud and Microsoft’s OneDrive have the option of intertwining their operating systems’ default folders, Documents, Music, etc., with their cloud storage and syncing services. If you use this feature, you would not need to remember which of your common files are stored and synced on the cloud or not.

When installing or configuring the other services, you could point them all to the same common folder. If you elected to consolidate iCloud and OneDrive access to your Documents folder and you use that folder as the common sync folder for all the services, all your synced files to sync to across all services.

The downside is that all your files will cost you cloud-storage space. All your Documents files will be synced with all the services and incur the cost of space in each of the services. This, even though there are probably a lot of files that needn’t be synced at all.

You could try something less dramatic, but it means keeping track of more. Consider whether you want to consolidate your Documents folder with iCloud and/or OneDrive.

consider consolidating all your services

Configure iCloud and OneDrive however you want and consolidate the rest of the services

Since all (but Resilio and Syncthing) charge for the cloud-storage used, you may want to minimize the amount of space used on each service. By sharing

Apple’s iCloud

Apple supports iCloud on Windows as well as macOS and its iOS devices. In macOS, you can configure it to consolidate with the local Documents and Pictures folders.

On Windows, the location cannot be changed using the iCloud interface. But if you can follow instructions, you can “move it” by having its default location reference the true folder location. See How to change the home dir of iCloud Drive (Windows version)?

  1. If you want to retain the files that are currently in your iCloudDrive directory (C:\Users\username\iCloudDrive, aka %USERPROFILE%\iCloudDrive), copy them to the new location. If your iCloud sync is current, this shouldn’t be necessary since the files are in the cloud and will be synced, later.
  2. Disable iCloud Drive from its settings. This will delete the files originally in the iCloud folder (but should still be safely in the cloud).
  3. Open a command prompt and type:
    mklink /J "%USERPROFILE%\iCloudDrive" "target_directory"

    This creates a junction, a reference, from the expected directory location to where the files reside.

  4. Reboot your computer and everything should be fine

Note that the iCloudDrive folder has its own .Trash, Desktop, and Documents folders, just as the local Windows user folder does. However, since iCloudDrive resides in the user folder, it cannot reference the user folder (because then it would contain itself and you would quickly fill your iCloud’s cloud-storage limits).

If you keep your Documents folder in Windows pretty spare, then you might want to share it with the iCloud/Documents directory. Rather than creating a Windows Junction from %USERPROFILE%\iCloudDrive.  Here’s a different approach than described, above:

  1. Open Task Manager to stop the iCloudServices and iCloudDrive processes.
  2. Move all the files from %USERPROFILE%\iCloudDrive\Documents to the “new” location, the documents directory at  %USERPROFILE%\Documents
  3. Remove the Documents directory from iCloudDrive
  4. Open a command prompt and type:
    mklink /J "%USERPROFILE%\iCloudDrive\Documents" "%USERPROFILE%\Documents"

    This creates a reference from the iCloudDrive\Documents location to the local Documents folder.

  5. Reboot the computer to reactivate the iCloud services.

In macOS, the iCloud sync folder is either shared with the local Documents, Desktop, .Trash folders or it is contained in its own folder, away from the user’s home directory.

Note, for what it’s worth, many of the names of the iCloud folders that appear in Explorer and Finder are different than the directory names on disk.

Google Drive

Google Drive is going through a bit of a branding change to “Backup and Sync from Google,” but most of its functionality is the same.

Back and Sync will be adding the ability to sync any folder, not just the ones below the, default, Google Drive folder in the home folder.

Resources

Backup Drobo NAS Content to CrashPlan on Windows

Drobo 5N NASCrashplan, online backup

One of the advantages of online backup service, CrashPlan, is their ability backup NAS (i.e., network) drives to their cloud. While that is technically true, they do not officially support that feature from Windows. They do describe how this should work, but it requires you to reinstall CrashPlan (per user, rather than all-users). You might try that first, that may work.

If your NAS device is a Drobo, then easily backing it all up is complicated by the fact that it does not support a singular view of all its content with a single share.  This summarizes a few tips to get this all working.

View all Drobo Shares in a Single Share

First, let’s make sure that we can get a singular view of all the Drobo’s content from a single share. If we don’t do this, we’d have to map every of Drobo’s shares as a separate drive letter, on Windows. Not only is this tedious, it may not even work if you have too many shares since there are only 26 letters in the alphabet. If you do not care about this convenience, you can skip to the next section.

    1. In Drobo Dashboard, add Share, e.g., “AllShares”. It should probably be limited to specific users… read-only?
    2. ssh into the Drobo and navigate to /mnt/DroboFS/Shares
      ssh my_drobo
      my_drobo:~$ cd /mnt/DroboFS/Shares
      

      I know, this is the “advanced” part you’ll need to have set up your Drobo for ssh access and enable a Windows utility to perform ssh (unless you have added the Bash support to Windows 10—you can use putty).

    3. Delete the AllShares directory that Dashboard created:
      rmdir AllShares
    4. Replace Drobo’s expected directory with a symbolic link to the pointing to the parent directory of all the directories that are the source of each share:
      ln -s /mnt/DroboFS/Shares AllShares 
    5. You may need to reboot the Drobo for this to work correctly.
    6. And/or you may need to reboot Windows or restart Workstation in order for Windows to not be confused about user permissions (if you changed any).
      net stop workstation
      net start workstation
      net start "Computer Browser"
      net start "..."
      

Now that we have a way to see all the NAS’s content via a single share, we can configure CrashPlan to back it up.

Allow CrashPlan to backup NAS volumes

CrashPlan requires that files and directories being backed up, in Windows, be accessible via drive letters. Thus, network “shares” need to be mapped as local drive letters in order for the Windows version of CrashPlan to recognize them.

After getting my system working, I realized that I did not have to do any of the steps I documented below. According to CrashPlan’s own document, “Backing Up A Windows Network Drive,” CrashPlan can be reinstalled per-user rather than for all users, system-wide; then the CrashPlan application will recognize the users’ network drive mappings. I did not get a chance to verify that this works.  If it does not work for you, continue with the following steps.

If CrashPlan is installed for All Users—the default—then it cannot see the network drives mapped by a specific user, since it is running as a “system” application. We need to set Windows to map drives which are visible to system applications, then they can be added to CrashPlan’s backup set.

The following is a summary of the detailed, illustrated steps from “The Crashplan Network Drive Backup Guide.” I recommend you follow that guide after going through the summary I’ve written, here.

  1. Create batch file to NAS volumes as local drives.
    1. Create a batch file. It can be any name, but it must have a .bat extension. Let’s call it AutoStart.bat
      net use N: \\DroboNAS\AllShares /username:WORKGROUP\Bill password
      

      Pick the drive letter (shown in the example as “N”) that you’d like it to use. Replace “DroboNAS” with the network name of your Drobo device. “WORKGROUP” is the workgroup or domain name that it belongs to and “Bill” and “password” correspond to the user that you’ve set up to access AllShares.

      I had trouble, initially, being able to set user-specific access permissions. What worked for me was to ensure that both the Drobo and my Windows machines were using the same workgroup name. And, because Windows requires the name be uppercase, it seems I had to ensure that the Drobo also used uppercase characters for the workgroup name.

      If you have multiple shares for the NAS and/or more than one NAS drive, add more entries to the batch file for each drive, as necessary.

    2. The batch file can be anywhere; the CrashPlan installation directory is as good a place as any.  %PROGRAMFILES%\CrashPlan (e.g., C:\Program Files\CrashPlan)
  2. Schedule file to run at login via Task Scheduler. It must be runnable as SYSTEM.
  3. Reboot or create a one-time trigger to execute the batch file during the current session (as SYSTEM).
  4. In the CrashPlan app’s Backup tab, click the Change… button under the Files section.
  5. Add the new drive and select/unselect share directories be included/excluded directories, as you normally would for local files and directories in the CrashPlan application.

Resources

  • CrashPlan, “Backing Up A Windows Network Drive.”  If your version of CrashPlan is recent and do not mind re-installing CrashPlan per-user, then the instructions are short. Initially, it wasn’t clear to me why this would work so I didn’t take this path.
  • TipsDotCom.com, “The Crashplan Network Drive Backup Guide.” This is the guide that I followed. While it is illustrated with an old version of Windows, it still works on Windows 10.

Windows 8.1 Tiled “Metro” Apps Stopped Working! Here’s a Fix

I own both Macs and PCs. I try not to be too much of a fan-boy and stay religiously neutral.  Both operating systems start to feel their age after being subjected to accumulation of apps and use.  I can run both for weeks on end without rebooting. But I have only been running Windows 8.1 for less than 2 months and I already ran into a severe quirk for which there was no obvious solution, none of the new, “Metro”, tiled applications would run. Trying to untangle this led to frustrating dead-end after dead-end. This kind of bad behavior is what gives Windows a bad reputation.

Jump down to the solution if you don’t care about the back-story. Continue reading Windows 8.1 Tiled “Metro” Apps Stopped Working! Here’s a Fix

Bring the Quick Launch Back (no need for “pinned” TaskBar Items)

Quick Launch Win8.1When I get a new product, I like trying out new features long enough to be able to evaluate whether they might be useful. Windows 7 introduced the “Pin to Taskbar” feature to replace the Quick Launch toolbar of prior versions of Windows. I found that the “Pin” feature provides no advantages over the Quick Launch toolbar and some disadvantages. If you have not used this feature before—in some XP installations, Quick Launch was not activated by default—you might try this out to see if it improves your efficiency in using Windows. Windows 7 and 8 have made this more difficult, so you’ll need to follow the instructions, following the break, to bring it back. Continue reading Bring the Quick Launch Back (no need for “pinned” TaskBar Items)

Retrieving from Old Backups (.bkf) with Windows 7

Okay, I know you have never used the Windows backup tool in Windows versions prior to Windows 7, so this article is not of any use to you. Windows 7 uses an entirely new scheme for storing backups and, out of the box, is not able to read the older backup files. (This might apply to Windows Vista, as well).

Just like VHS tapes and floppy diskettes, backup files that were created with prior versions of Windows are going by the wayside and are not usable, by default, under Windows 7. Fortunately, Microsoft has made a utility available for Windows 7 that can retrieve files from those old backup-files. First, you will need to get Microsoft’s program from Windows NT Backup Restore Utility for Windows 7. Continue reading Retrieving from Old Backups (.bkf) with Windows 7

VMware: Running Your Apps Safely in a Virtual Environment

As a software/techy/geek, I love VMware Workstation for Windows (and Linux and Fusion for OSX). These products allow an operating system to run within the context of the operating system—a computer within a computer, so to speak. This allows a single machine to be used to run any applications without having to to use multiple machines, dual-boot, or reinstall applications. Continue reading VMware: Running Your Apps Safely in a Virtual Environment

Transferring iTunes Content

To retain all the playlist, podcast status, apps, and media organization in your iTunes setup do the following:

  1. Install iTunes.
  2. Make sure iTunes is not running.
  3. Copy all the media files from your old machine to the new. If all the media is in the standard iTunes location, copy to the entire iTunes directory.
    XP:
    C:\Documents and Settings\username\My Documents\My Music\iTunes
    Win7:
    C:\Users\username\Music\iTunes
    OSX:
    /Users/username/Music/iTunes

    In Finder, navigate to Home Directory, Music, iTunes.

  4. Copy any media outside the iTunes area to their same paths on the new machine.
  5. Start iTunes and let it rebuild its database.

If you are using iTunes to sync your contacts and other personal information with your iPod’s or iPhone’s, then be sure that the application that holds the personal data is installed and up to date before syncing the device.

Upgrading Windows 7, In-place

One cool, little mentioned feature of Windows 7 is that it can be updated to a grander version, as quickly and easily as installing an security update. You can simply enter the license key for the version of Windows 7 that you want to update to and let the system upgrade itself—an Anytime Update license, which can be purchased for an incremental price (compared to paying the full price), can be used as well.

  1. Right-click on Computer to bring up its context menu and select Properties or open the System settings from the Control Panel.
  2. Unless you already have Windows 7 Ultimate installed, the section at the top, “Windows edition” should have a link that says “Get more features with a new edition of Windows 7.” Click on that link.
  3. After entering the license key for the new Windows version, After inputing a valid key the upgrade files will be downloaded and installed on the machine. The machine may reboot a couple of times.

Migrating Skype Chat History

After installing Skype on a new machine, make sure it is not running. Then, the chat history from an old installation can be moved to the new installation. The Skype user directories in the new installation need to be replaced with the ones from the prior installation, adding them, if necessary.

XP:
C:\Documents and Settings\username\Application Data\Skype\skypeuser
Win 7:
C:\Users\username\AppData\Roaming\Skype\skypeuser

Username is the windows login name under which the given Skype installation will run. Skypeuser is one or more Skype user ids that will log into Skype under the given windows login. If you are using Windows’ Explorer, make sure that “protected operating system files” are shown. (I replaced the entire Skype directory and that also worked).

See Move Skype History From Windows XP To Windows 7, but realize that it says that only the “chatsync” directories need to be copied over… that will not work, however, the entire parent directory (skypeuser) must be copied.