
One of the advantages of online backup service, CrashPlan, is their ability backup NAS (i.e., network) drives to their cloud. While that is technically true, they do not officially support that feature from Windows. They do describe how this should work, but it requires you to reinstall CrashPlan (per user, rather than all-users). You might try that first, that may work.
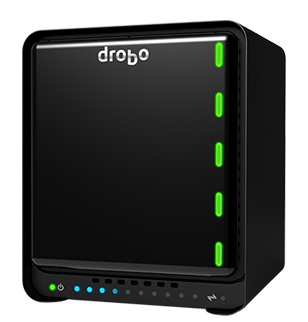
If your NAS device is a Drobo, then easily backing it all up is complicated by the fact that it does not support a singular view of all its content with a single share. This summarizes a few tips to get this all working.
View all Drobo Shares in a Single Share
First, let’s make sure that we can get a singular view of all the Drobo’s content from a single share. If we don’t do this, we’d have to map every of Drobo’s shares as a separate drive letter, on Windows. Not only is this tedious, it may not even work if you have too many shares since there are only 26 letters in the alphabet. If you do not care about this convenience, you can skip to the next section.
-
- In Drobo Dashboard, add Share, e.g., “AllShares”. It should probably be limited to specific users… read-only?
- ssh into the Drobo and navigate to /mnt/DroboFS/Shares
ssh my_drobo
my_drobo:~$ cd /mnt/DroboFS/Shares
I know, this is the “advanced” part you’ll need to have set up your Drobo for ssh access and enable a Windows utility to perform ssh (unless you have added the Bash support to Windows 10—you can use putty).
- Delete the AllShares directory that Dashboard created:
rmdir AllShares
- Replace Drobo’s expected directory with a symbolic link to the pointing to the parent directory of all the directories that are the source of each share:
ln -s /mnt/DroboFS/Shares AllShares
- You may need to reboot the Drobo for this to work correctly.
- And/or you may need to reboot Windows or restart Workstation in order for Windows to not be confused about user permissions (if you changed any).
net stop workstation
net start workstation
net start "Computer Browser"
net start "..."
Now that we have a way to see all the NAS’s content via a single share, we can configure CrashPlan to back it up.
Allow CrashPlan to backup NAS volumes
CrashPlan requires that files and directories being backed up, in Windows, be accessible via drive letters. Thus, network “shares” need to be mapped as local drive letters in order for the Windows version of CrashPlan to recognize them.
After getting my system working, I realized that I did not have to do any of the steps I documented below. According to CrashPlan’s own document, “Backing Up A Windows Network Drive,” CrashPlan can be reinstalled per-user rather than for all users, system-wide; then the CrashPlan application will recognize the users’ network drive mappings. I did not get a chance to verify that this works. If it does not work for you, continue with the following steps.
If CrashPlan is installed for All Users—the default—then it cannot see the network drives mapped by a specific user, since it is running as a “system” application. We need to set Windows to map drives which are visible to system applications, then they can be added to CrashPlan’s backup set.
The following is a summary of the detailed, illustrated steps from “The Crashplan Network Drive Backup Guide.” I recommend you follow that guide after going through the summary I’ve written, here.
- Create batch file to NAS volumes as local drives.
- Create a batch file. It can be any name, but it must have a .bat extension. Let’s call it AutoStart.bat
net use N: \\DroboNAS\AllShares /username:WORKGROUP\Bill password
Pick the drive letter (shown in the example as “N”) that you’d like it to use. Replace “DroboNAS” with the network name of your Drobo device. “WORKGROUP” is the workgroup or domain name that it belongs to and “Bill” and “password” correspond to the user that you’ve set up to access AllShares.
I had trouble, initially, being able to set user-specific access permissions. What worked for me was to ensure that both the Drobo and my Windows machines were using the same workgroup name. And, because Windows requires the name be uppercase, it seems I had to ensure that the Drobo also used uppercase characters for the workgroup name.
If you have multiple shares for the NAS and/or more than one NAS drive, add more entries to the batch file for each drive, as necessary.
- The batch file can be anywhere; the CrashPlan installation directory is as good a place as any. %PROGRAMFILES%\CrashPlan (e.g., C:\Program Files\CrashPlan)
- Create a batch file. It can be any name, but it must have a .bat extension. Let’s call it AutoStart.bat
- Schedule file to run at login via Task Scheduler. It must be runnable as SYSTEM.
- Reboot or create a one-time trigger to execute the batch file during the current session (as SYSTEM).
- In the CrashPlan app’s Backup tab, click the Change… button under the Files section.
- Add the new drive and select/unselect share directories be included/excluded directories, as you normally would for local files and directories in the CrashPlan application.
Resources
- CrashPlan, “Backing Up A Windows Network Drive.” If your version of CrashPlan is recent and do not mind re-installing CrashPlan per-user, then the instructions are short. Initially, it wasn’t clear to me why this would work so I didn’t take this path.
- TipsDotCom.com, “The Crashplan Network Drive Backup Guide.” This is the guide that I followed. While it is illustrated with an old version of Windows, it still works on Windows 10.